
Chocolate Mousse Recipe for Quick Desserts
Why You’ll Love This Recipe
Who doesn’t love dessert with minimal effort and maximum yum? This 2-ingredient chocolate mousse might just become your new go-to treat. Whether you’re craving something sweet after dinner, planning a romantic dinner at home, or need a last-minute dessert for guests—this mousse delivers.
Here’s why it’s so popular:
- Quick and easy: Just two ingredients and no complicated steps.
- Rich & creamy: You get a luscious, restaurant-quality texture without eggs or gelatin.
- Minimal cleanup: Fewer ingredients = fewer dishes.
- Perfect for customization: Add toppings, infuse flavor, or turn it into a parfait—your choice!
- Great make-ahead option: Ideal for stress-free entertaining.
Isn’t it amazing when such a simple combo can feel like a gourmet dessert? Let’s dive into the delicious details!
Essential Tools and Equipment
You don’t need a fancy kitchen setup to make this mousse. Here’s what you’ll need:
- Mixing bowls: One large bowl for whipping cream and a microwave-safe bowl (or saucepan) for melting chocolate.
- Electric mixer or hand whisk: To whip the cream to soft peaks. A stand mixer works too!
- Rubber spatula: To gently fold the chocolate into the whipped cream.
- Serving glasses or ramekins: For a pretty presentation if serving to guests.
- Chilling space in your refrigerator: Crucial to set the mousse.
If you have a hand mixer, even better—it’ll save your arms from all that whisking!
Preparation Tips
Making mousse might sound intimidating, but this recipe is full of little tricks to make it practically foolproof.
- Chill your mixing bowl and beaters: Cold tools help the cream whip faster and hold better.
- Melt chocolate slowly: Use a microwave in short bursts or a double boiler to avoid burning.
- Let chocolate cool slightly before mixing: You don’t want it too hot or it will deflate the whipped cream.
- Use quality ingredients: With only two ingredients, flavor depends on their quality. Choose high-quality dark chocolate (at least 60%).
- Make ahead: This dessert tastes even better after chilling for a few hours. Ideal for guests or dinner parties.
Want to infuse flavor? Add a splash of espresso, orange zest, or a pinch of sea salt during the melting stage!
Ingredients List
Just two ingredients stand between you and dessert bliss:
- 1 ½ cups (360 ml) heavy whipping cream (cold)
- 8 oz (225 grams) high-quality dark chocolate, chopped
That’s it!
Ingredient Tips:
– Use heavy cream or whipping cream with at least 35% fat for best results.
– For a slightly sweeter mousse, use a semi-sweet chocolate (around 50–60% cocoa).
– Avoid chocolate chips—they contain stabilizers that can affect texture.
Step-by-Step Directions
Ready to whip up this dreamy chocolate mousse? Follow these easy steps:
- Melt the chocolate: In a medium microwave-safe bowl, microwave chopped chocolate in 20-second increments, stirring in between, until smooth. Alternatively, melt over a double boiler.
- Cool the chocolate: Let the melted chocolate cool for 5–10 minutes. It should be warm but not hot to the touch.
- Whip the cream: In a large chilled bowl, use a hand or stand mixer to whip the heavy cream until soft peaks form. Don’t over-whip!
- Combine chocolate and cream: Add a few spoonfuls of whipped cream into the melted chocolate. Stir gently to lighten the texture.
- Fold gently: Now transfer the lightened chocolate into the rest of the whipped cream. Use a spatula to fold slowly, keeping the mixture light and airy.
- Spoon and chill: Divide into serving glasses or ramekins. Chill for at least 1 hour for a firmer set, or 2–4 hours for best results.
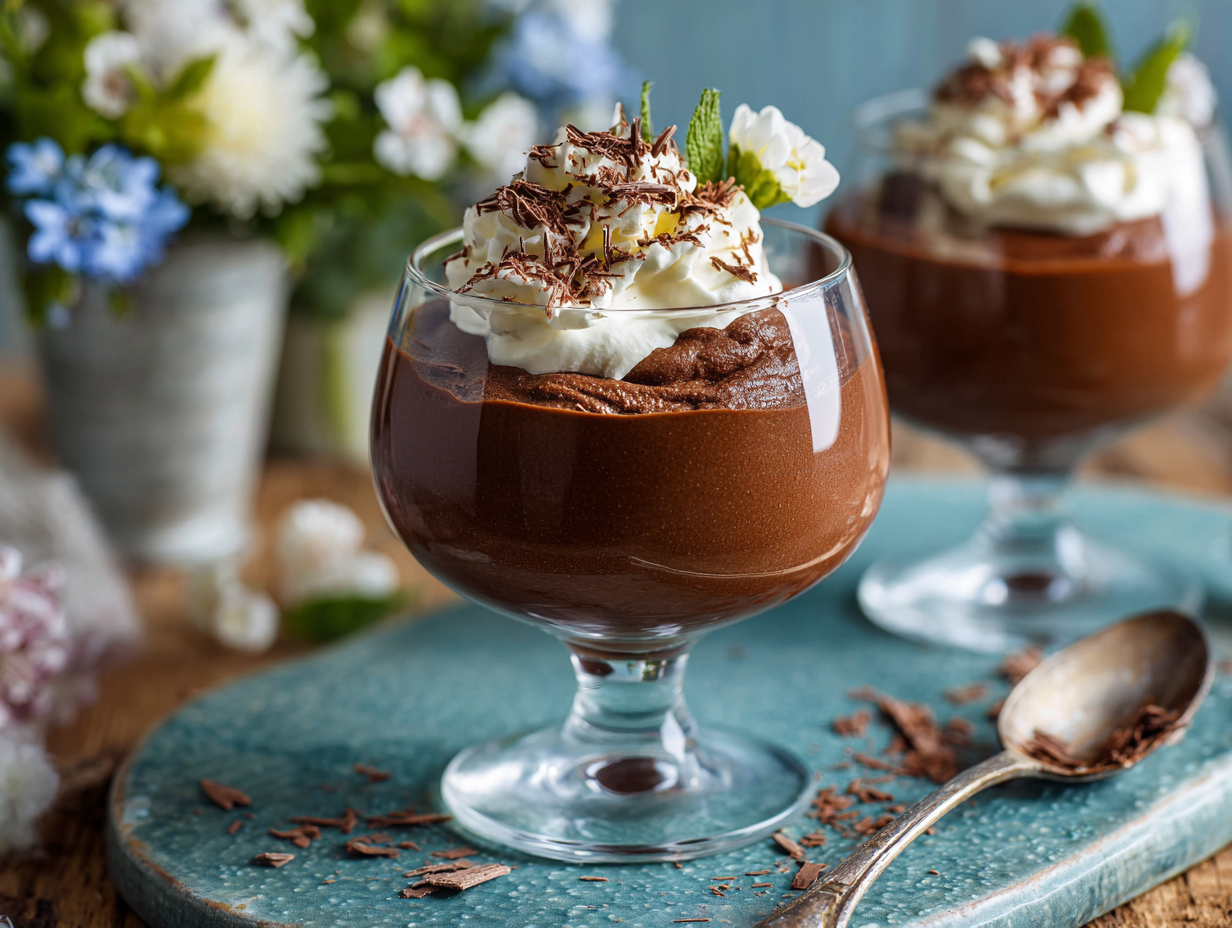
Serve as-is, or top with shaved chocolate, berries, or a dollop of whipped cream.
Common Mistakes to Avoid
Even the simplest recipes have a few sneaky pitfalls. Here’s what to watch out for:
- Mixing hot chocolate into cream: If the chocolate is too hot, it can melt the cream and ruin the mousse’s texture.
- Overwhipping the cream: Beating the cream too stiff can make the mousse grainy or separate when mixing.
- Folding too roughly: Gentle folding keeps the mousse airy. Don’t stir vigorously or you’ll deflate it.
- Skipping the chill time: The mousse needs time to set and develop full flavor. Don’t rush—it’s worth the wait!
Remember: patience and care equal perfect results.
Best Side Dishes
Want to turn this into a full dessert spread? Here are a few delicious pairings:
- Fresh Berries: Strawberries, raspberries, and blueberries balance the richness with a juicy burst of tartness.
- Espresso or coffee: Bitterness from coffee enhances the deep cocoa notes in the mousse—like a match made in heaven!
- Pistachio biscotti or almond cookies: Adds crunch and nutty flavor to contrast the creaminess.
- Vanilla ice cream: For chocolate lovers who want to go big or go home.
All of these elevates your mousse into restaurant-level indulgence!
Expert Recipe Tips
Want to make this mousse truly unforgettable? Here are a few chef-worthy tricks:
- Add a flavor boost: Stir in 1 teaspoon of espresso powder, orange zest, or a splash of liqueur like Grand Marnier.
- Use white or milk chocolate: Change the vibe completely by swapping chocolate types—just adjust sweetness accordingly.
- Turn it into a layered dessert: Alternate layers of mousse and crushed cookies or berries in a parfait glass.
- Add a pinch of salt: A tiny sprinkle of flaky sea salt brings out incredible depth in dark chocolate.
The beauty of this recipe lies in its adaptability—make it your own!
Storage and Reheating Instructions
If you’ve got leftovers (or like to prep ahead), here’s how to store and enjoy later:
- Refrigeration: Cover mousse tightly with plastic wrap or lids. Store in the fridge for up to 4 days. Individual servings make for easy snacking!
- Freezing: Mousse can be frozen for up to 1 month. Thaw in the fridge overnight.
- Reheating: No reheating needed! But let refrigerated mousse sit at room temperature for 5–10 minutes before serving for creamier texture.
Tip: Don’t microwave to reheat—the cream will separate. Always keep this dessert chilled unless serving.
Frequently Asked Questions (FAQs)
1. Can I make this chocolate mousse ahead of time?
Yes! In fact, it’s even better after chilling for a few hours. You can make it a day in advance with no problem.
2. Can I use milk or white chocolate instead?
Absolutely. Milk chocolate will make it sweeter and creamier. White chocolate can work too—just reduce the amount slightly due to its richness.
3. Is this mousse gluten-free?
Yes! As long as your chocolate doesn’t contain any added gluten ingredients, this mousse is naturally gluten-free.
4. What if I don’t have a mixer?
You can whip the cream by hand with a whisk—it’ll just take more effort. Chill your whisk and bowl beforehand to help.
5. Can I make this recipe dairy-free?
You can try using full-fat coconut cream instead of whipping cream. Chill the can, scoop out the solid cream, and whip it. Use dairy-free chocolate too!
Final Thoughts
We all need that one dessert that’s always a hit—and this easy 2-ingredient chocolate mousse is just that. It’s simple, luxurious, and endlessly adaptable. Perfect for date night, holidays, dinner parties, or late-night cravings.
Whether you’re brand new to making mousse or just want less mess in the kitchen, this recipe will leave you (and your lucky guests) amazed that something so elegant came from two humble ingredients.
So what are you waiting for? Give it a go, and don’t forget to:
- Leave a comment below with how it turned out for you
- Tag us on social media with your mousse creations
- Try our other easy dessert recipes—like Easy Peanut Butter Fudge or 4-Ingredient No-Bake Cheesecake!
Happy whisking and even happier eating! 🍫🍨
—
Ready for another quick and delicious treat? Check out our Easy Peanut Butter Fudge Recipe that’s just as simple and satisfying!